Create Your First Secure Access Path
This page is written for first-time Larktun users. It uses test@larktun.com as an example and walks you through the first ACL rule so devices under that account can access each other.
For your first setup, do not try to model every device, subnet, and port at once. Start with one working path between two online devices, for example:
- A laptop accessing a home NAS admin page
- A phone accessing a web service on a dev machine
- An office computer SSHing into a personal workstation
- A team member accessing an internal test server
Understand This ACL First
An ACL answers three questions:
action: whether this rule allows or denies traffic. For the first rule, useaccept.src: who starts the connection. In this example,test@larktun.com@means devices owned by this user.dst: who can be reached and which ports are allowed. In this example,test@larktun.com@:*means devices owned by this user, with all ports allowed first.
So the example rule in this page means:
Allow devices under
test@larktun.comto access each other.
The example uses :* to allow all ports so beginners can verify connectivity quickly. After the first test works, narrow the target and port, such as only NAS port 443 or SSH port 22.
Before you start
- You are signed in to the Larktun console as
test@larktun.com. - At least two devices are signed in to the Larktun client and shown as online in
Machines. - You know the service you want to test, such as
SSH 22,HTTPS 443,RDP 3389, or another web service port. - If you need to access a device inside a routed subnet instead of a device running the Larktun client directly, approve the subnet route in
Routesfirst.
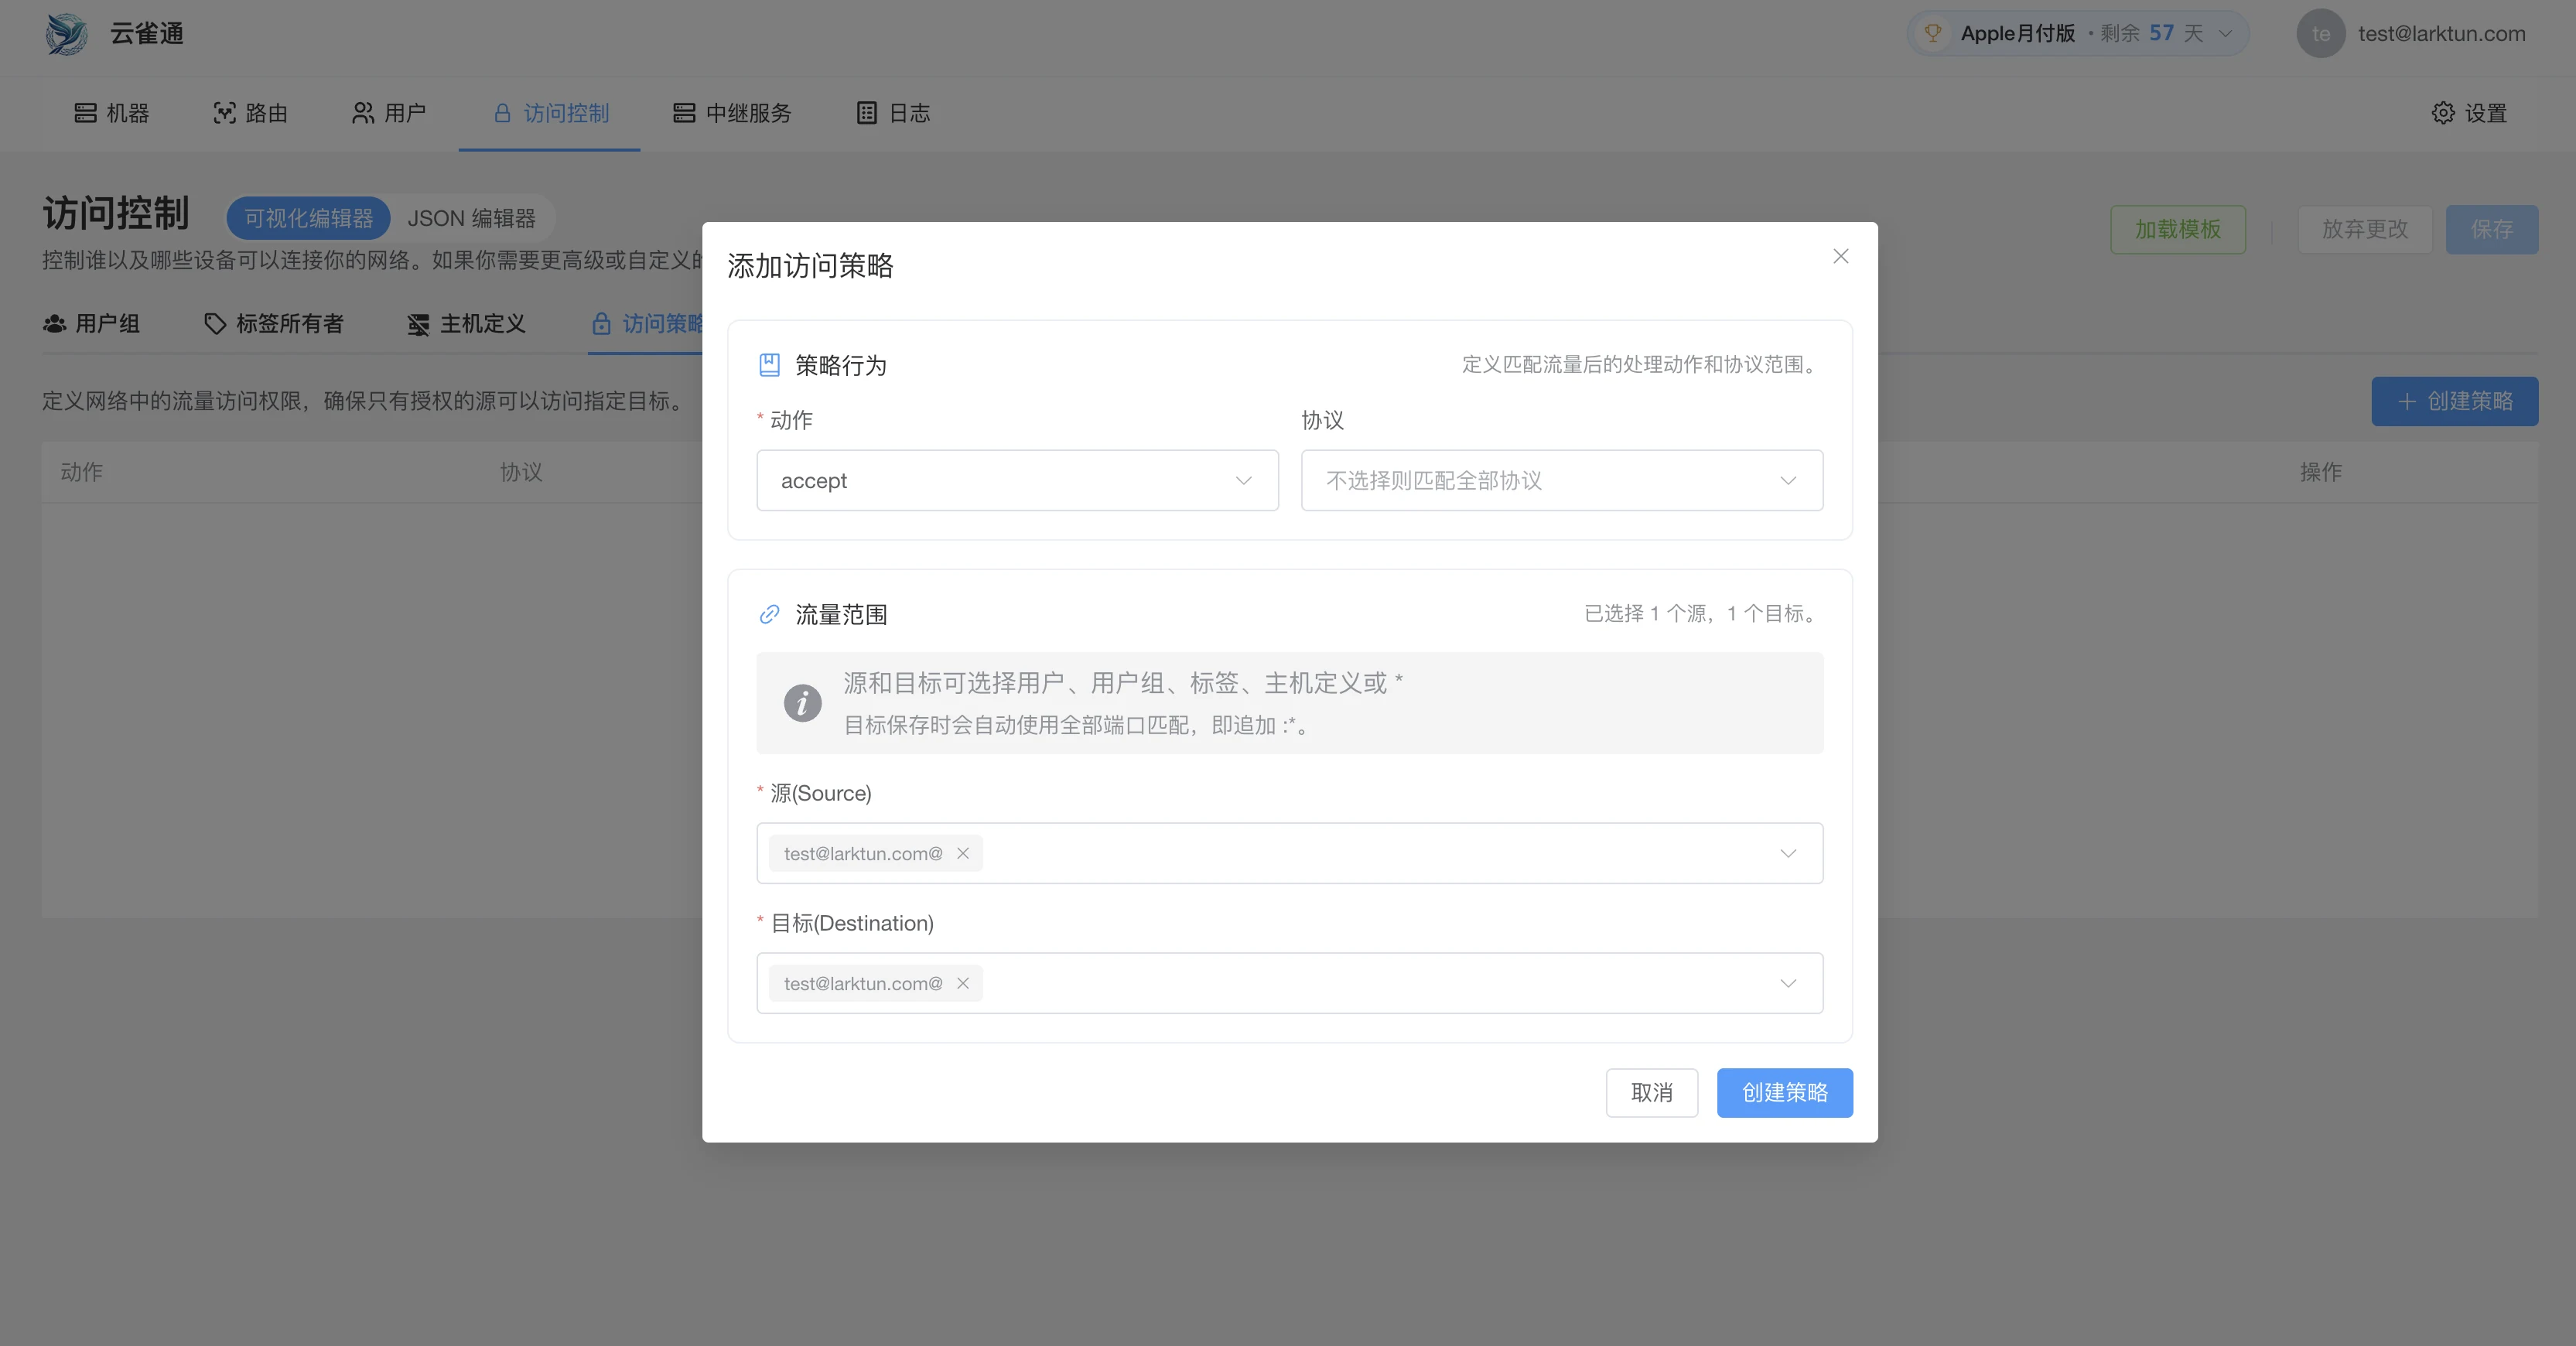
Option 1: Use the Visual Editor
This is the recommended path for your first ACL. The visual editor builds the ACL fields for you and avoids common syntax mistakes.
- Sign in to the Larktun console and confirm the account in the upper-right corner is
test@larktun.com. - Open
Access Controland stay inVisual Editor. - Open the access policy tab and click
Create Policy. - Set the policy action to
accept. - Leave protocol unselected for the first test so all protocols are matched; narrow it later if needed.
- In
Source, selecttest@larktun.com. - In
Destination, selecttest@larktun.com. - Click
Create Policy, then clickSavein the upper-right corner.
After saving, this rule allows devices owned by test@larktun.com to access each other. In other words, if two devices are signed in with this account and online, you can use this rule for the first connectivity test.
Option 2: Use the JSON Editor
If you prefer editing the policy directly, switch to JSON Editor, paste the policy below, and click Save:
{
  "groups": {},
  "tagOwners": {},
  "hosts": {},
  "acls": [
    {
      "action": "accept",
      "src": ["test@larktun.com@"],
      "dst": ["test@larktun.com@:*"]
    }
  ],
  "autoApprovers": {}
}

The most common mistake is missing :* at the end of the destination. It means "all ports on the target". If you already know the exact port, you can make the destination more specific, such as test@larktun.com@:22.
Verify Device Connectivity
After configuring ACL, run a real connection test immediately:
- In
Machines, confirm the source and target devices are online. - On the target device, confirm the service is running, such as SSH, a web admin page, or remote desktop.
- From the source device, connect to the target device's Larktun address or device name.
- For a web service, open the target address and port in a browser.
- For SSH, run
ssh username@target-device-address. - If you need bidirectional access, test the reverse direction from the other device too.
If the source device can reach the target service, your first secure access path is working.
Tighten the Rule After the First Test
The example rule is useful for first-time validation. For long-term use, narrow it step by step:
- Allow only the real user or user group that needs access.
- Allow only the real target, such as a NAS, dev machine, or server.
- Allow only required ports, such as
22,443, or3389. - In team environments, prefer user groups and device tags instead of maintaining individual accounts manually.
- Add one rule at a time, validate it, then expand.
Quick Troubleshooting Hints
- Both devices are online but cannot connect: check whether ACL source, destination, and port match the request.
- The rule was created in the visual editor but traffic is still blocked: confirm you clicked
Save, wait a few seconds, and retry. - The target service does not open: confirm the service is running on the target and the local firewall is not blocking it.
- Subnet resource unreachable: check whether the subnet route is approved in
Routes. - A specific port fails: confirm
dstcontains the right port, such as:22,:443, or:*. - High latency: free relay is available by default; for optimization, choose a dedicated relay or custom relay in
Relay Services.
Next step
- Continue with Approve Subnet Routes
- Open Common Issues
- Read ACLs Introduction
- Revisit Deployment Modes and Configuration
- Extend with additional scenarios in Showcase