Install Tailscale on Synology NAS and Log In to Larktun
This guide walks you through one goal: adding a Synology NAS to your Larktun network. When you finish, the NAS will appear in Larktun's device list and receive a private Larktun address.
The setup has eight steps:
- Find the Synology NAS LAN IP.
- Install Tailscale in Synology DSM.
- Temporarily enable SSH on the NAS.
- Open the Synology terminal from your computer.
- Create a Larktun Auth Key.
- Run the Larktun login command in the Synology terminal.
- Return to Larktun and confirm that the NAS is online.
- Sign in to Larktun on your computer and open DSM through the NAS's private
100.64.0.xIP.
You do not need Linux experience. Follow the screenshots in order, and do not copy the example username, IP address, or key from an image.
- A Synology NAS with internet access
- A DSM account in the
administratorsgroup and its password - A Windows, macOS, or Linux computer on the same local network as the NAS
- A working Larktun account
1. Find the DSM version and NAS LAN IP
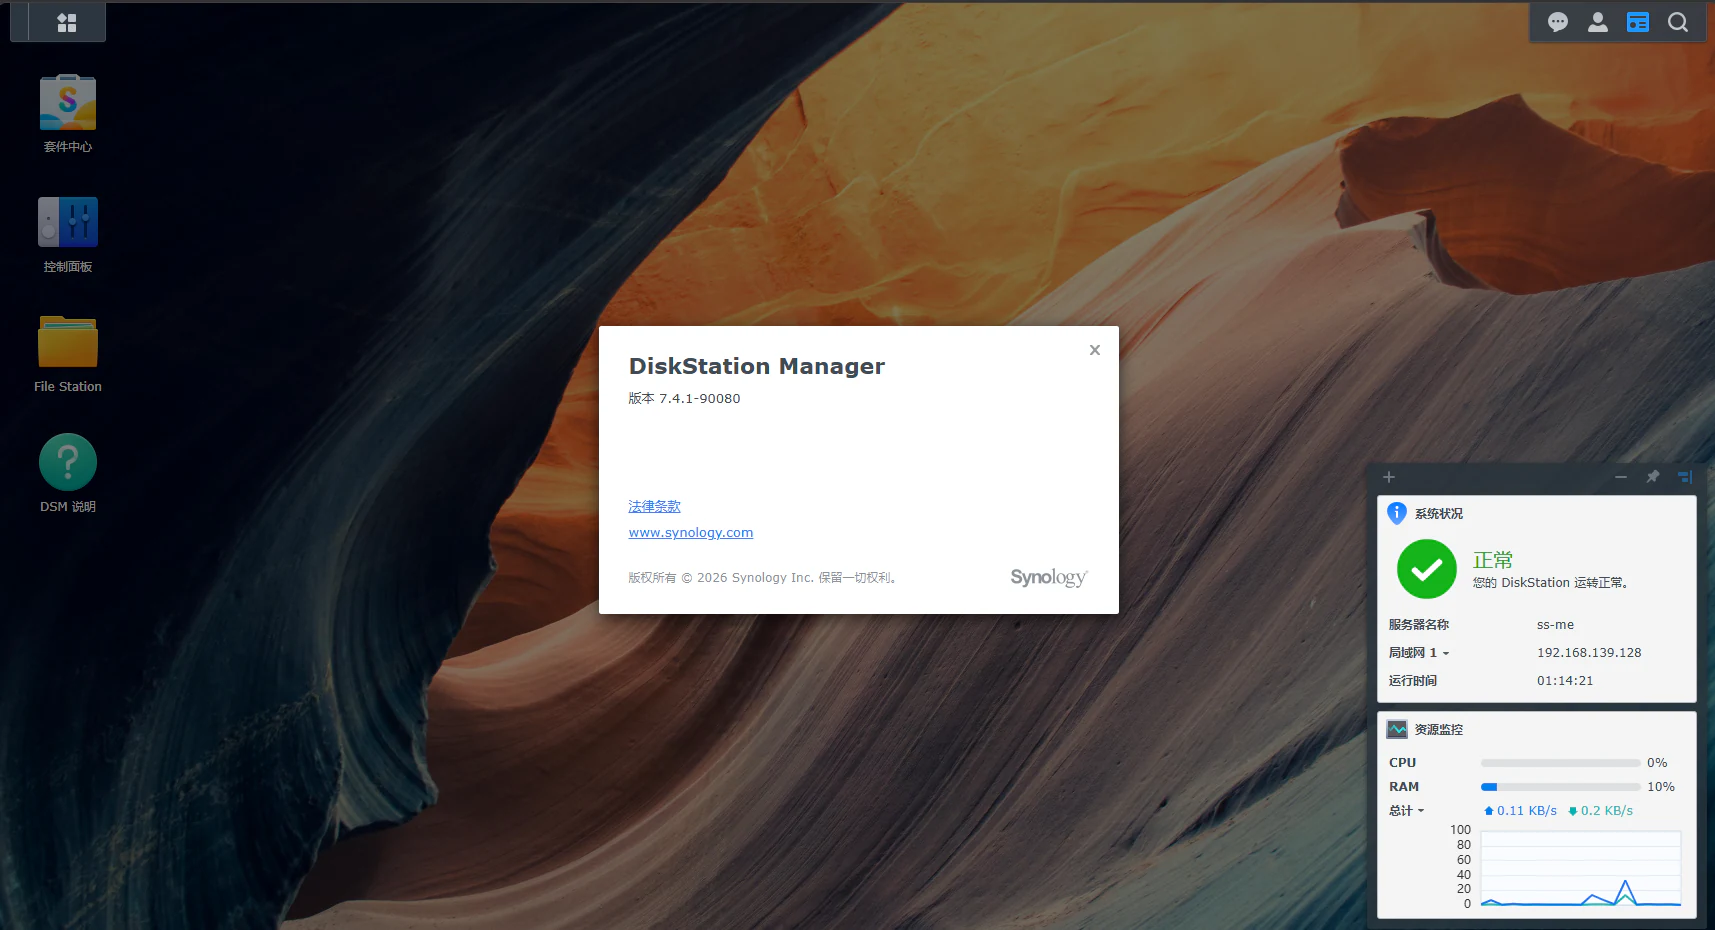
Sign in to Synology DSM first. Open the system information menu in the top-right corner to see the DSM version. The System Health widget normally shows the NAS LAN IP.
The screenshots use DSM 7.4.1 and the example IP 192.168.139.128. Your version and IP will probably be different. Write down your own NAS IP because you will use it for SSH later.
2. Install Tailscale from Synology Package Center
Open Package Center from the DSM desktop.
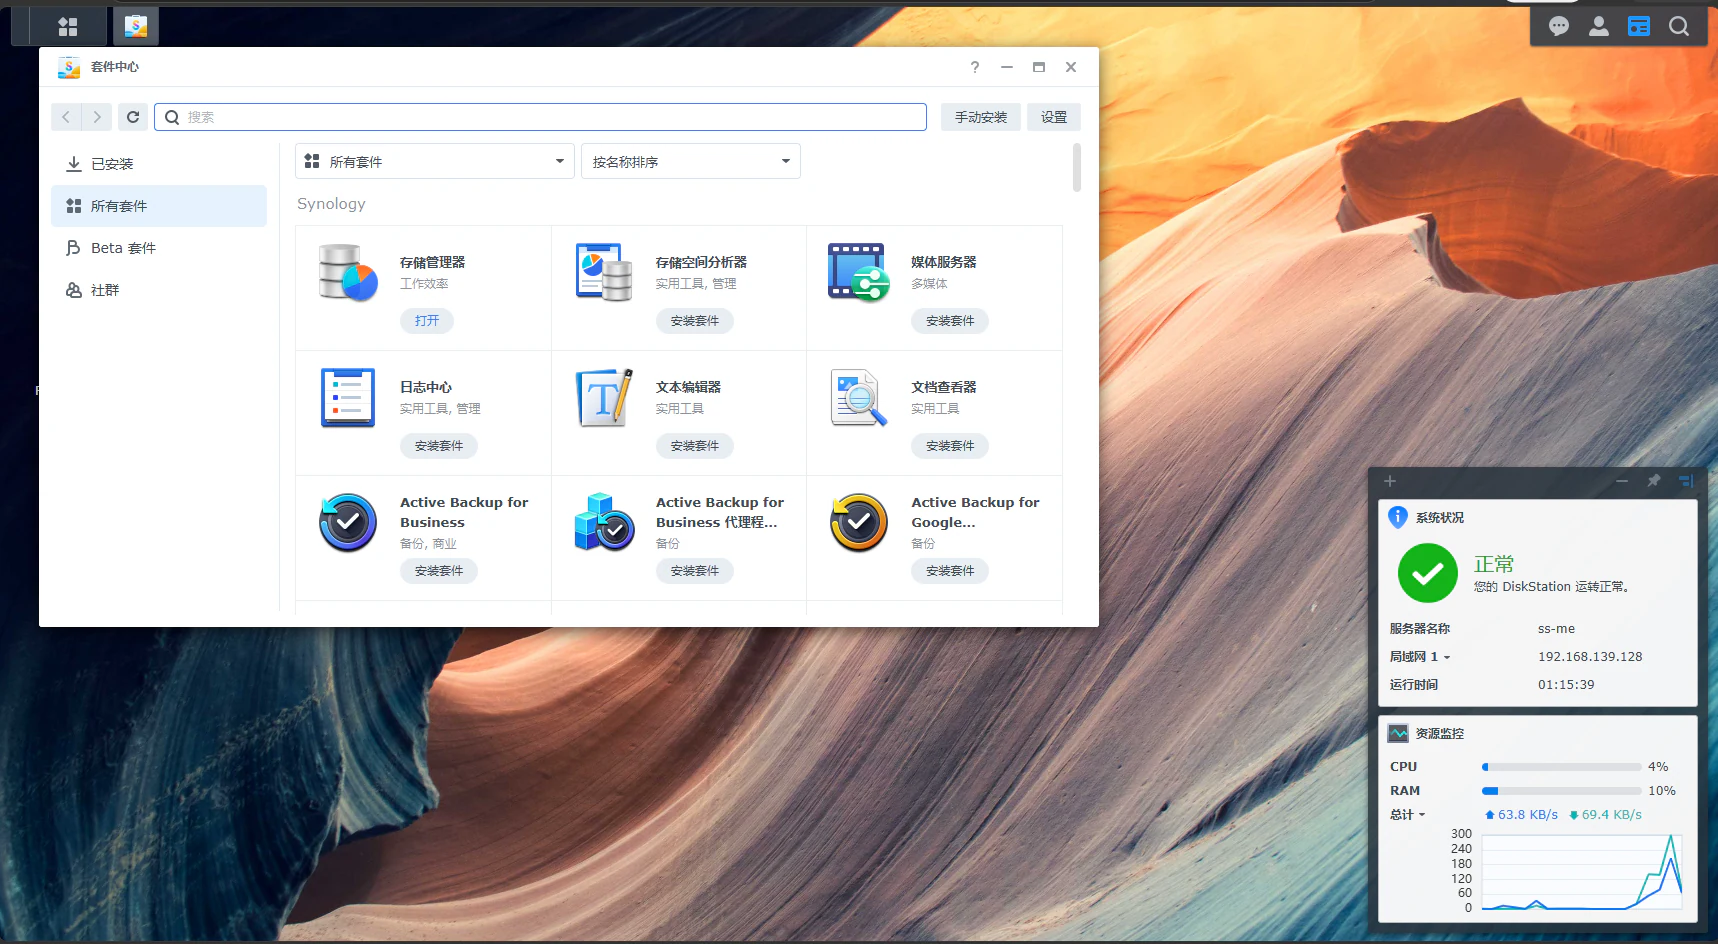
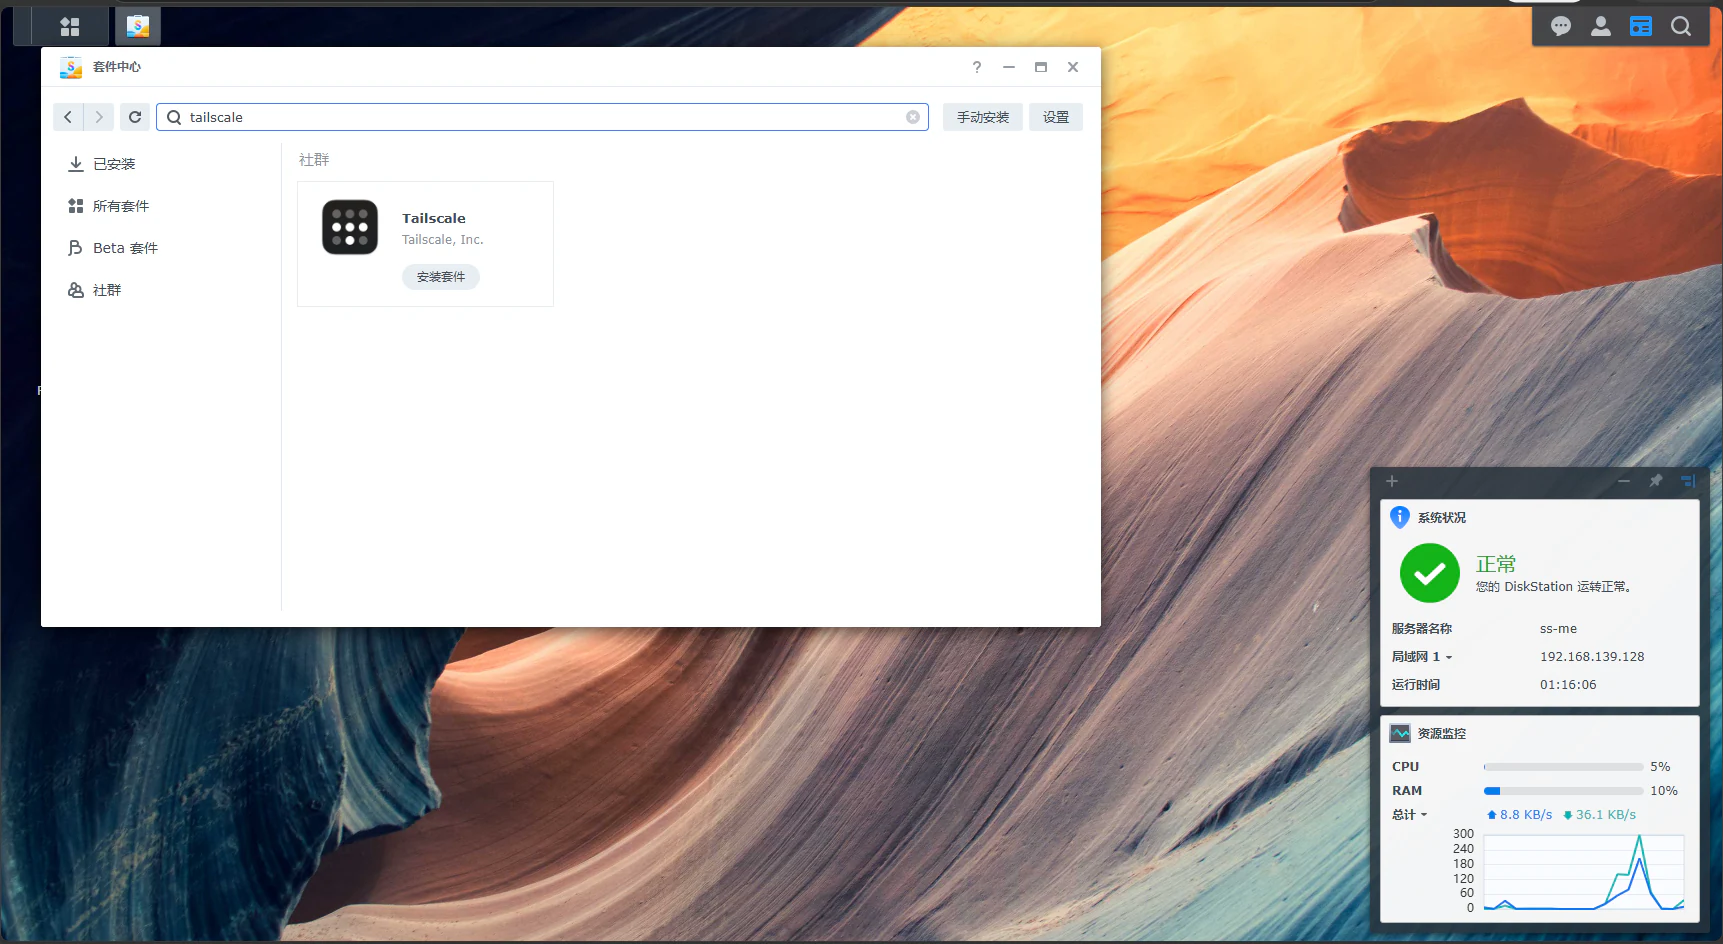
Enter tailscale in the search box. Find the Tailscale package published by Tailscale, Inc., then click Install.
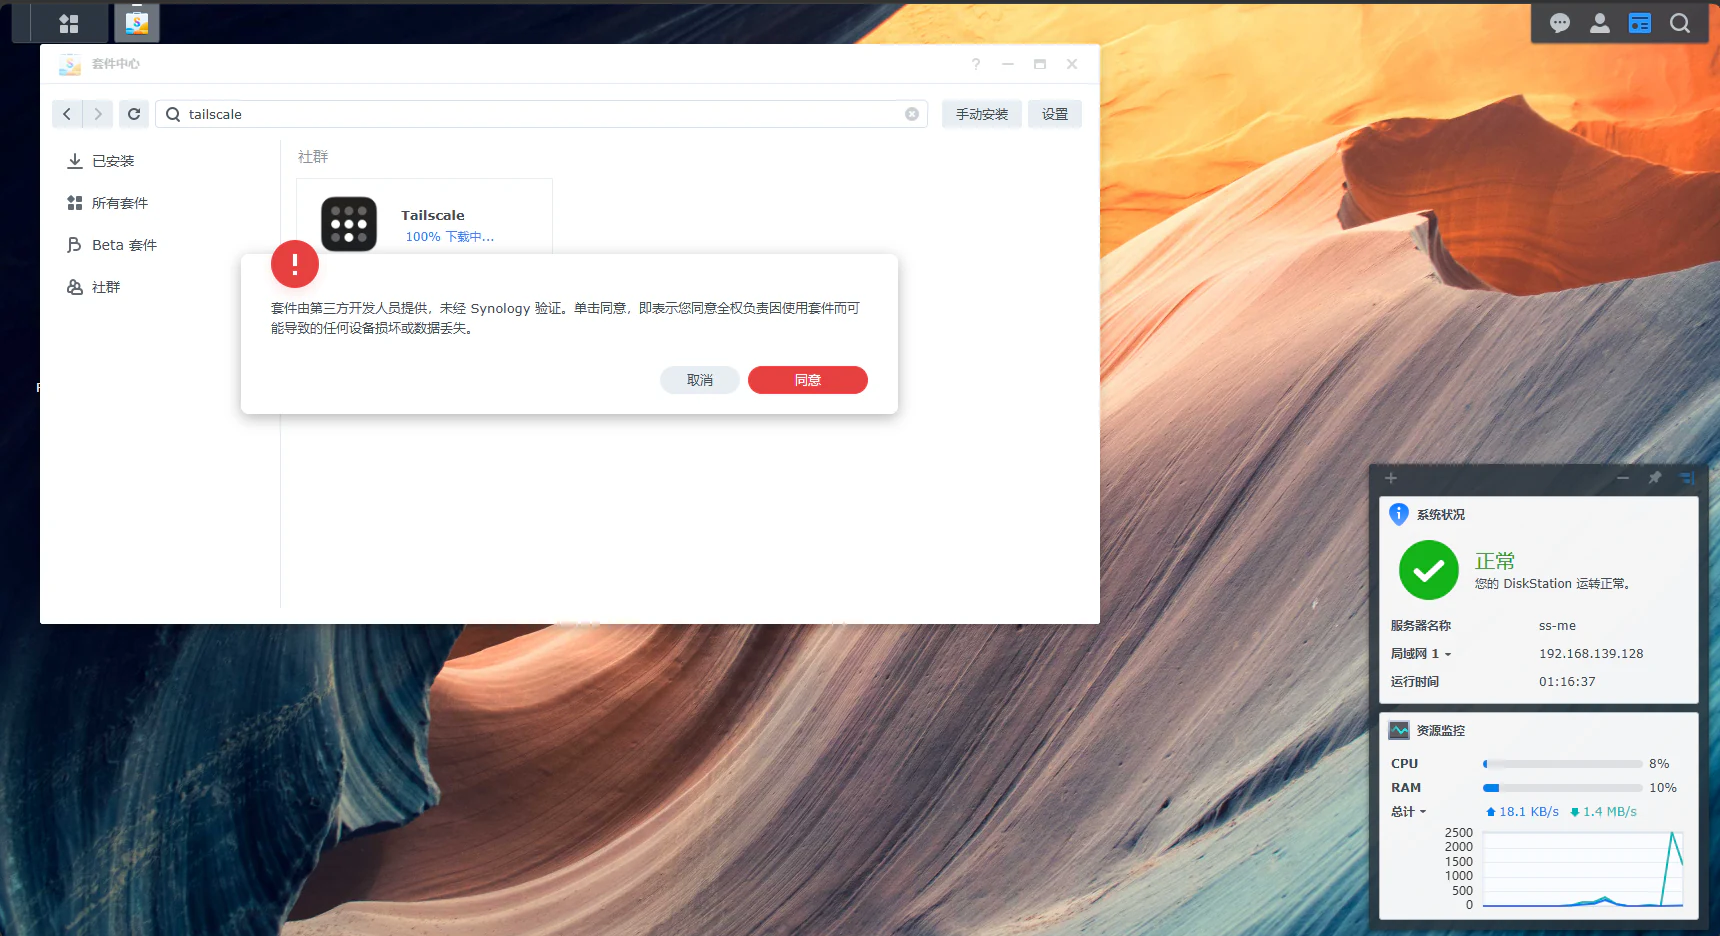
DSM may warn that a third-party developer provides the package. After confirming that the developer is Tailscale, Inc., click Agree to continue.
When installation finishes, Tailscale appears under Installed with an Open button. This means the package is ready.
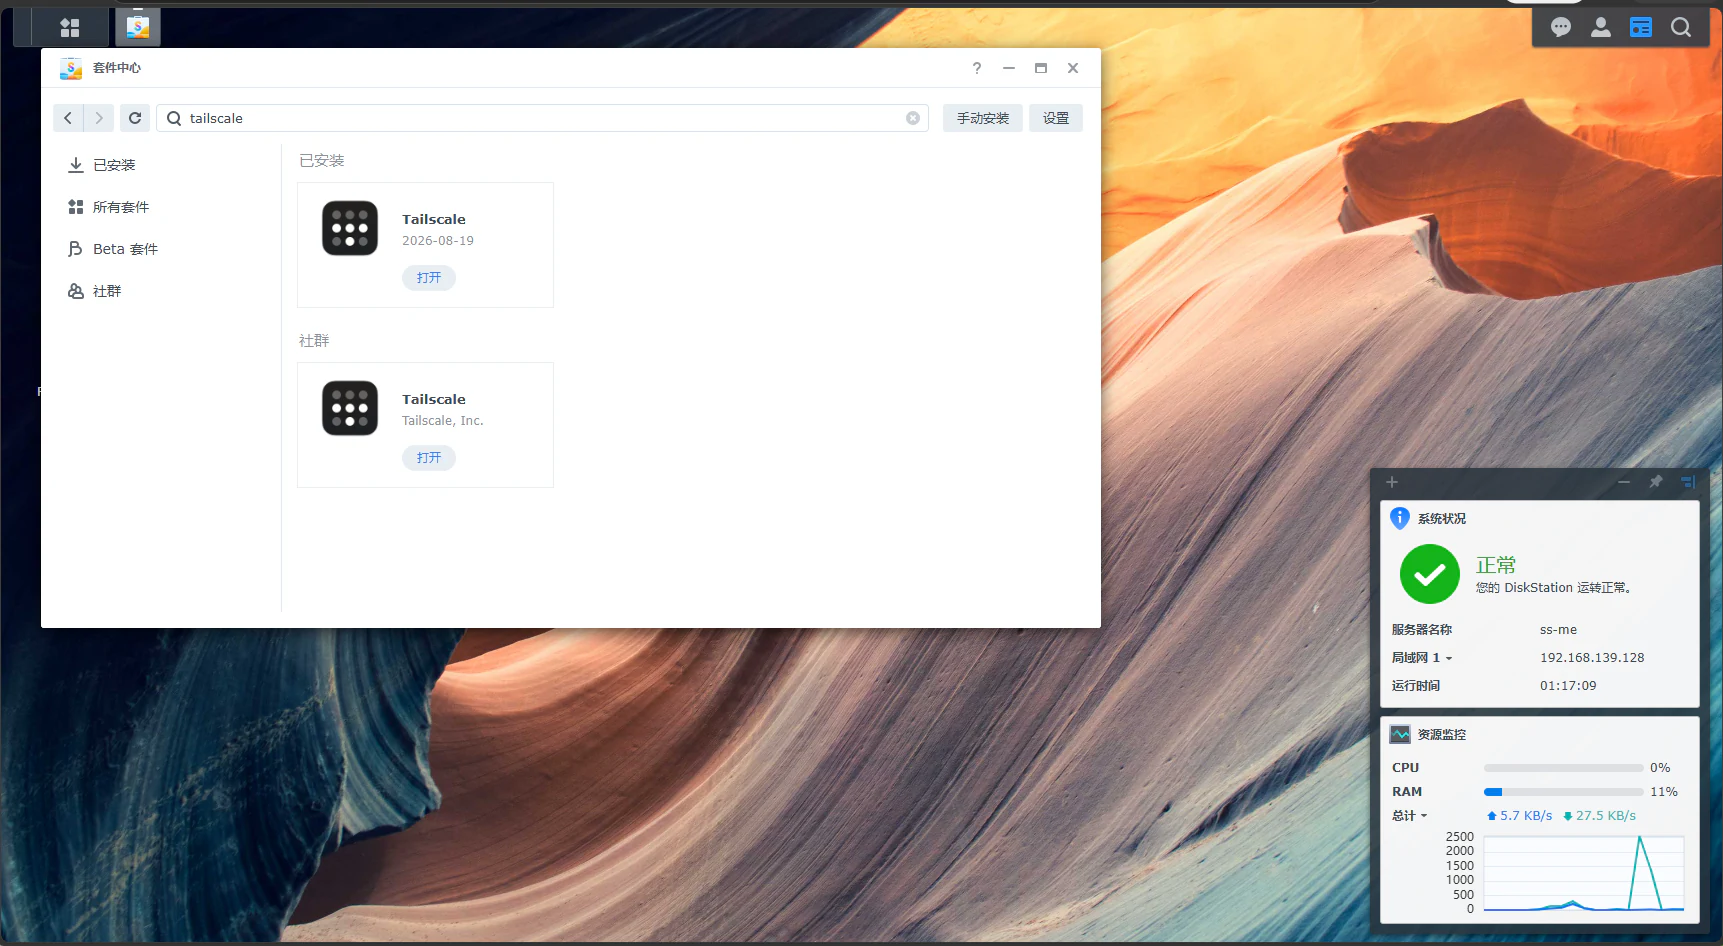
The software is installed but not connected yet. Do not use a normal Tailscale account login here. You will point the package to Larktun from the terminal later.
3. Temporarily enable SSH on Synology DSM
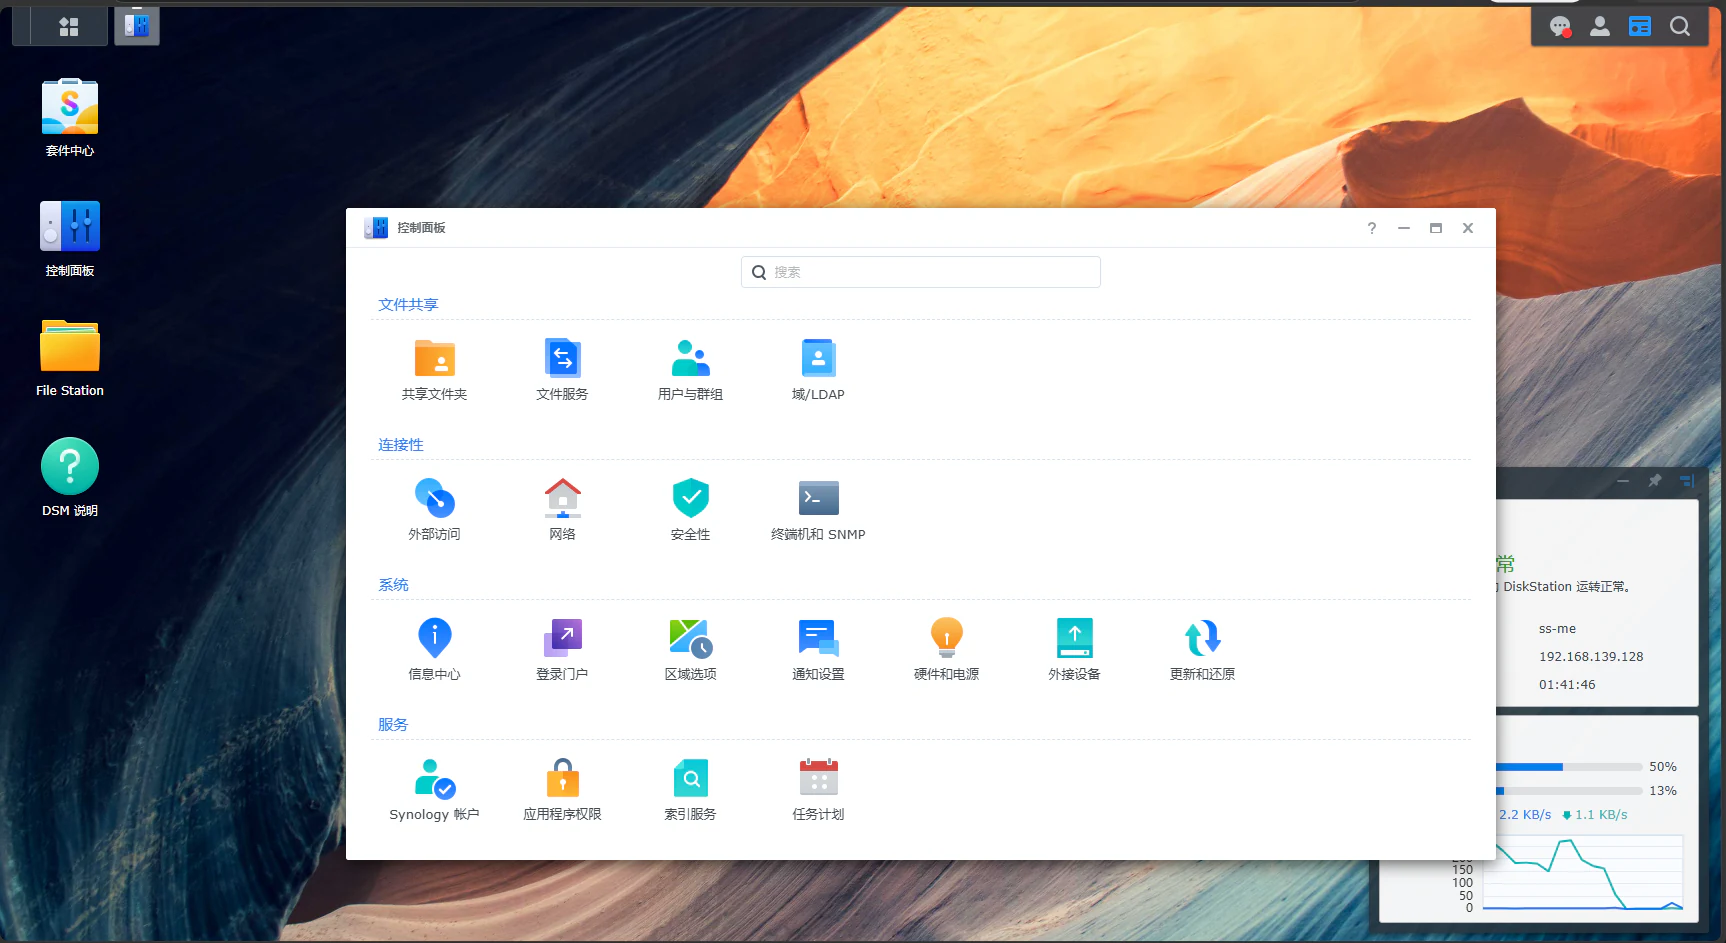
You only need SSH to run one command. Start by opening Control Panel from the DSM desktop.
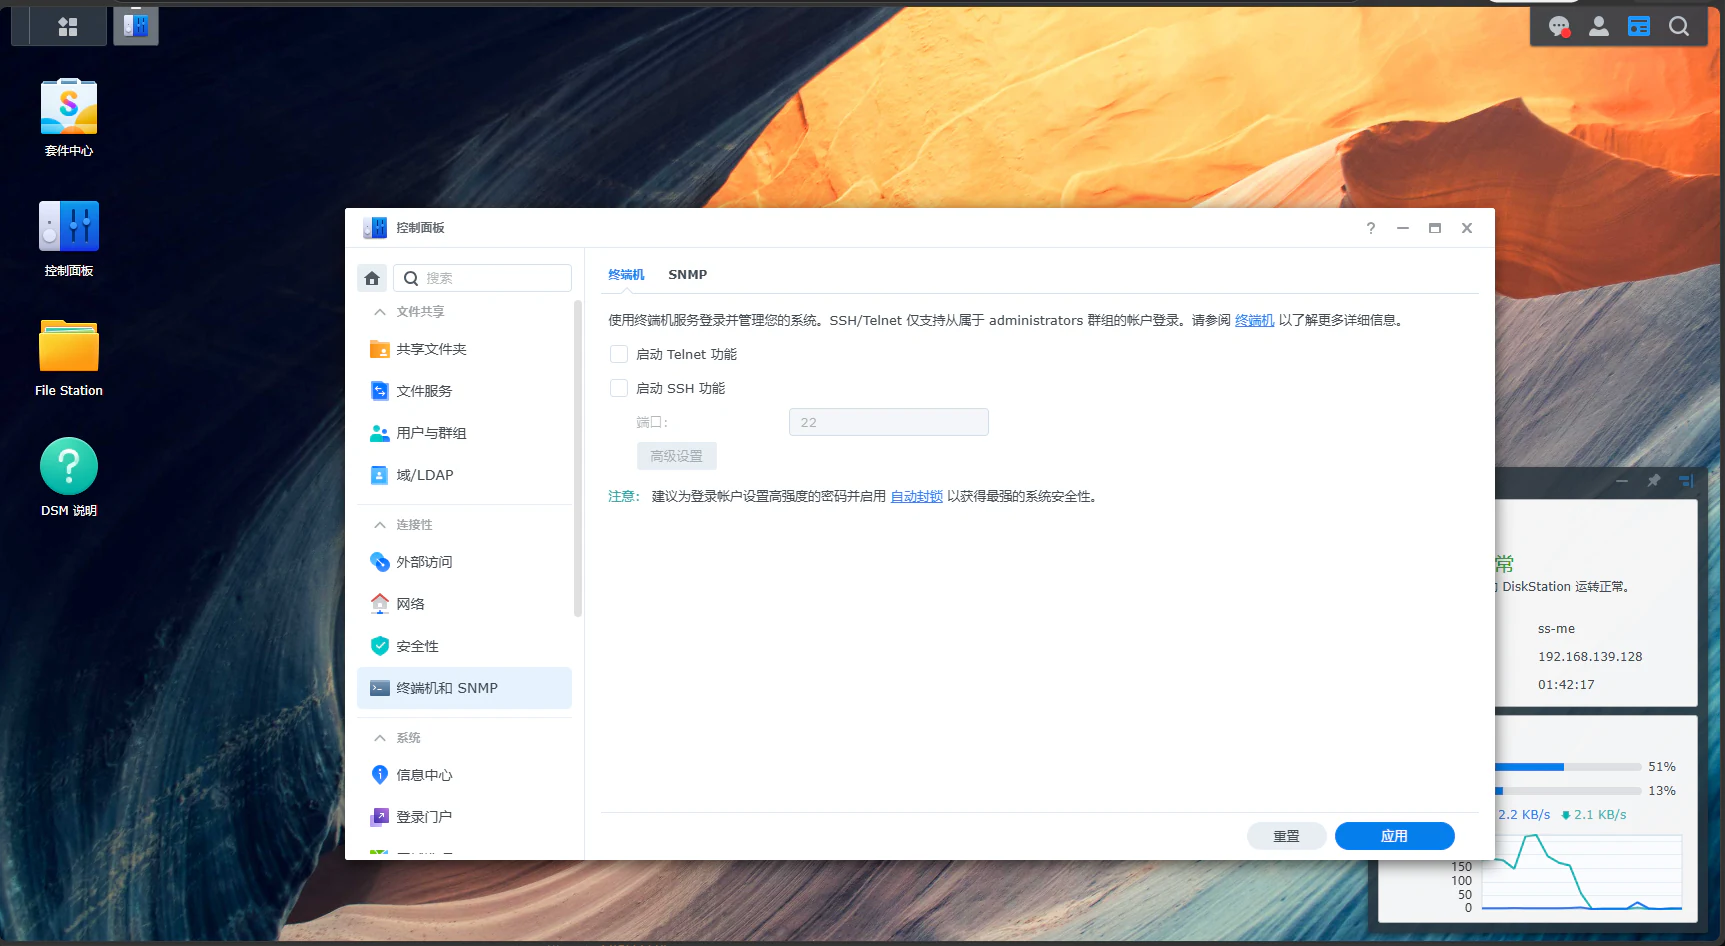
Open Connectivity > Terminal & SNMP from the left navigation, then select the Terminal page. Enable SSH service is normally unchecked the first time you open it.
Select Enable SSH service, keep the default port 22, and click Apply in the bottom-right corner.
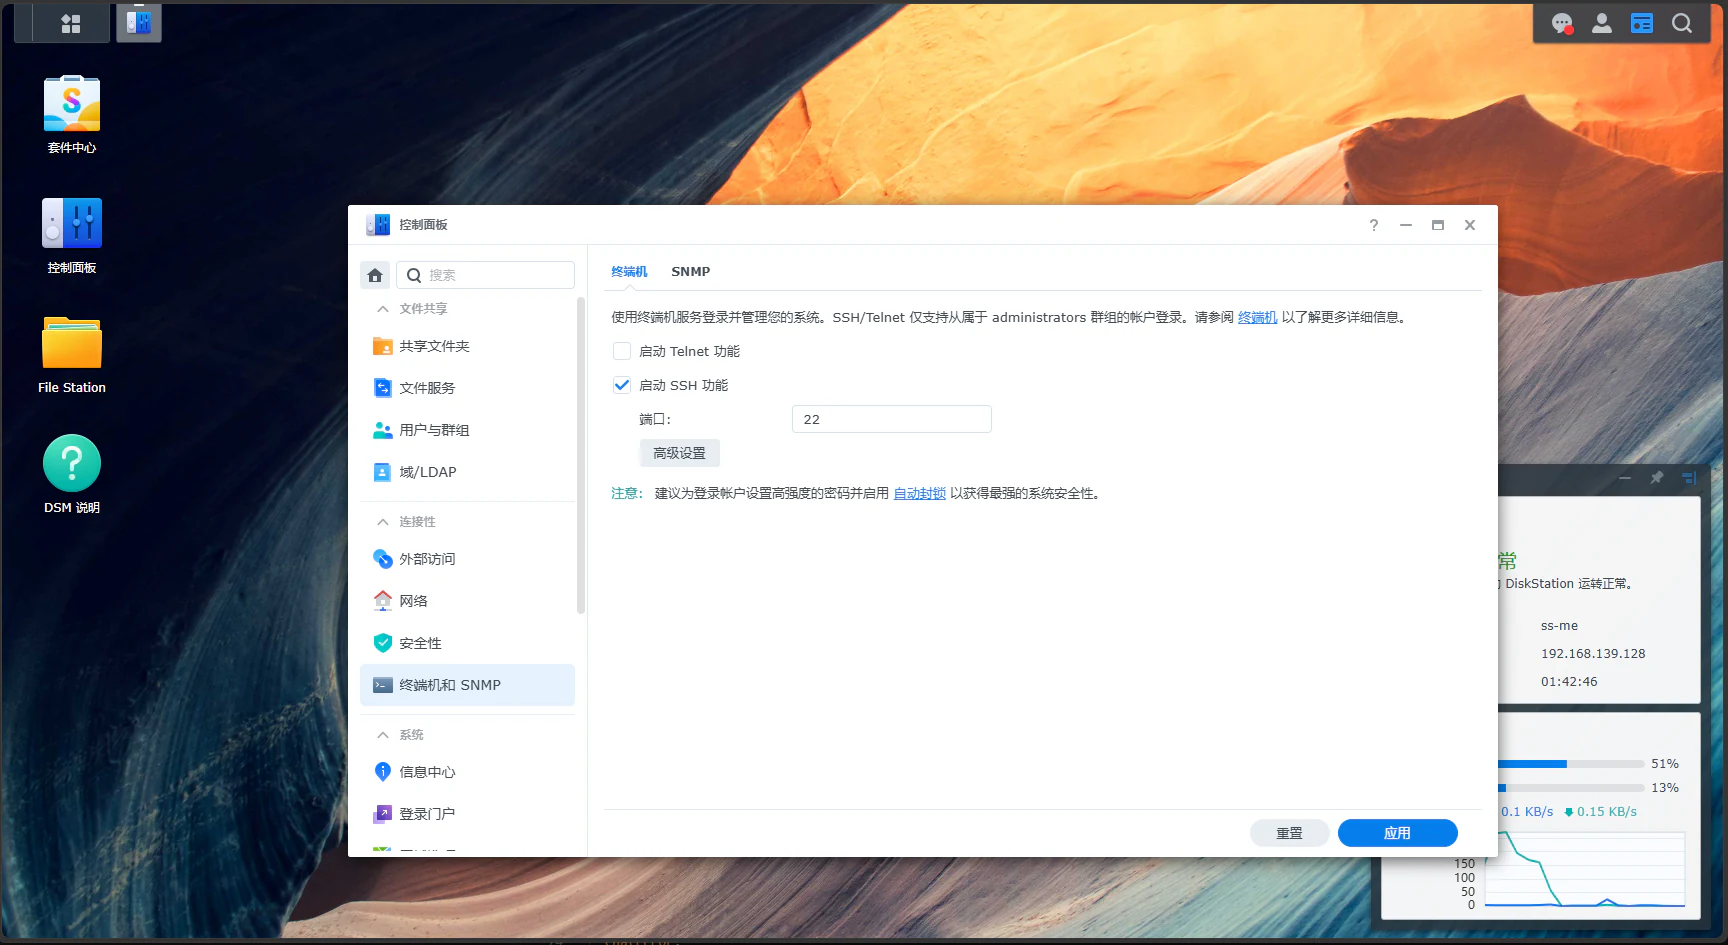
Use SSH only from a trusted home or office LAN. Do not forward port 22 from your router to the public internet. After setup, you can return to this page, clear the checkbox, and click Apply. The Tailscale package will keep running.
4. Log in to the Synology terminal from your computer
On Windows, open PowerShell or Windows Terminal. On macOS or Linux, open Terminal. Enter:
ssh YOUR_DSM_USERNAME@YOUR_NAS_IP
Replace both placeholders first:
YOUR_DSM_USERNAMEis your DSM administrator username, not your Larktun account.YOUR_NAS_IPis the Synology LAN IP you found in step 1.
For example, if the DSM username is djc and the NAS IP is 192.168.139.128, the command is:
ssh djc@192.168.139.128

The first connection may display a message and ask:
Are you sure you want to continue connecting (yes/no/[fingerprint])?
After checking that the IP belongs to your NAS, enter yes and press Enter.
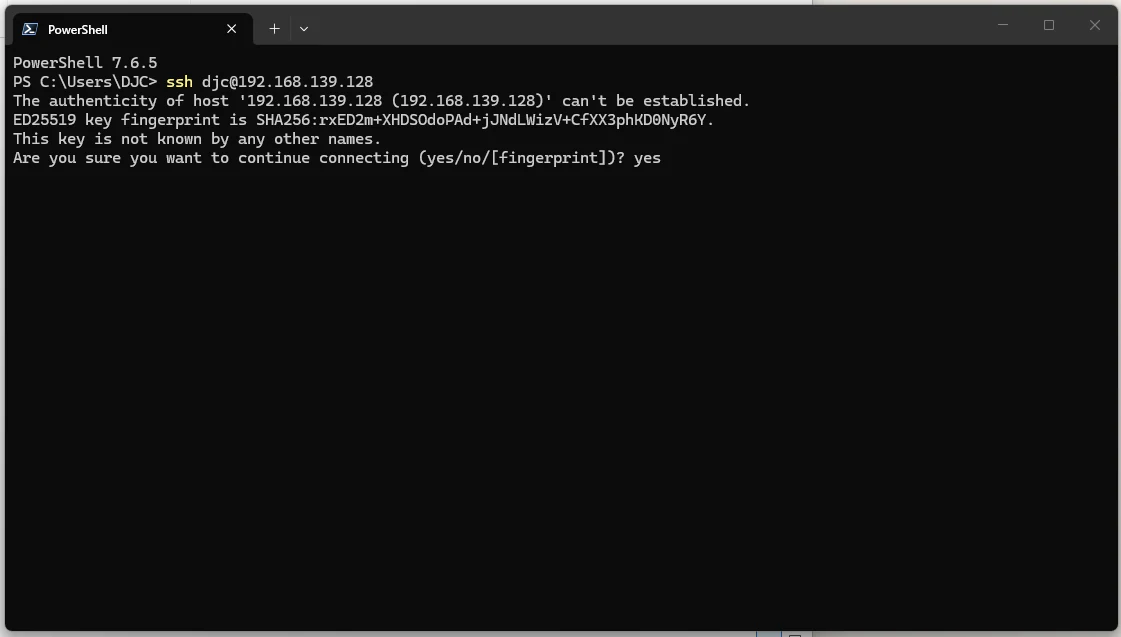
At the password: prompt, enter your Synology DSM account password and press Enter.
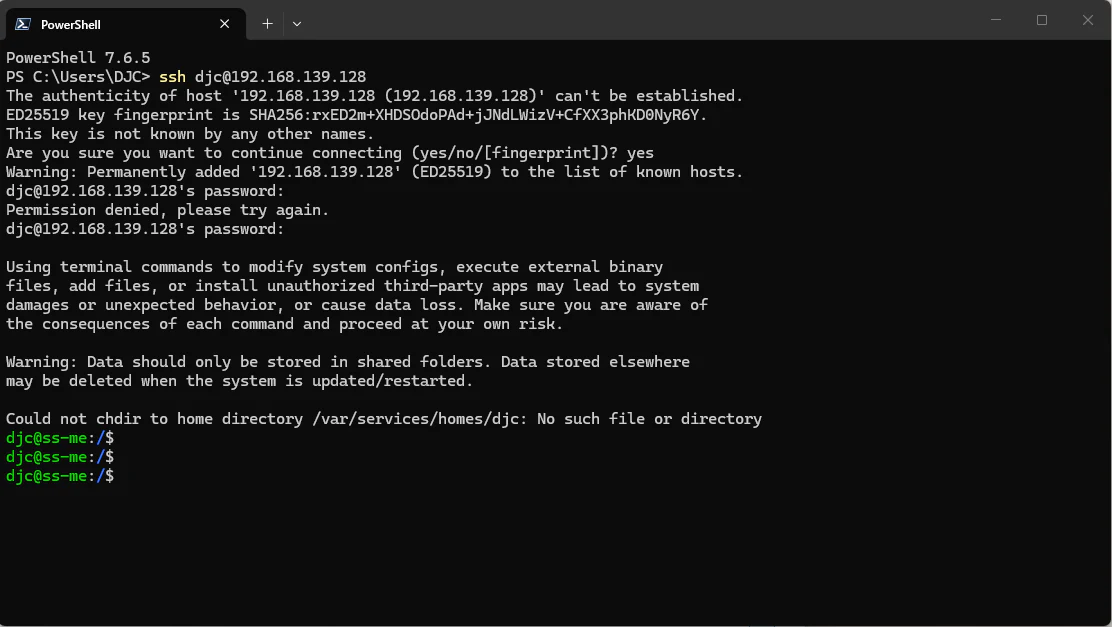
The terminal does not show your password or even placeholder characters. Type the complete password and press Enter. If you see Permission denied, please try again., check the password and retry.
When you see a prompt similar to username@NAS-name:~$, the SSH login has succeeded. The Could not chdir to home directory warning in the screenshot only means that DSM user homes are disabled for this account. It does not block the rest of the guide.
5. Create a Larktun Auth Key
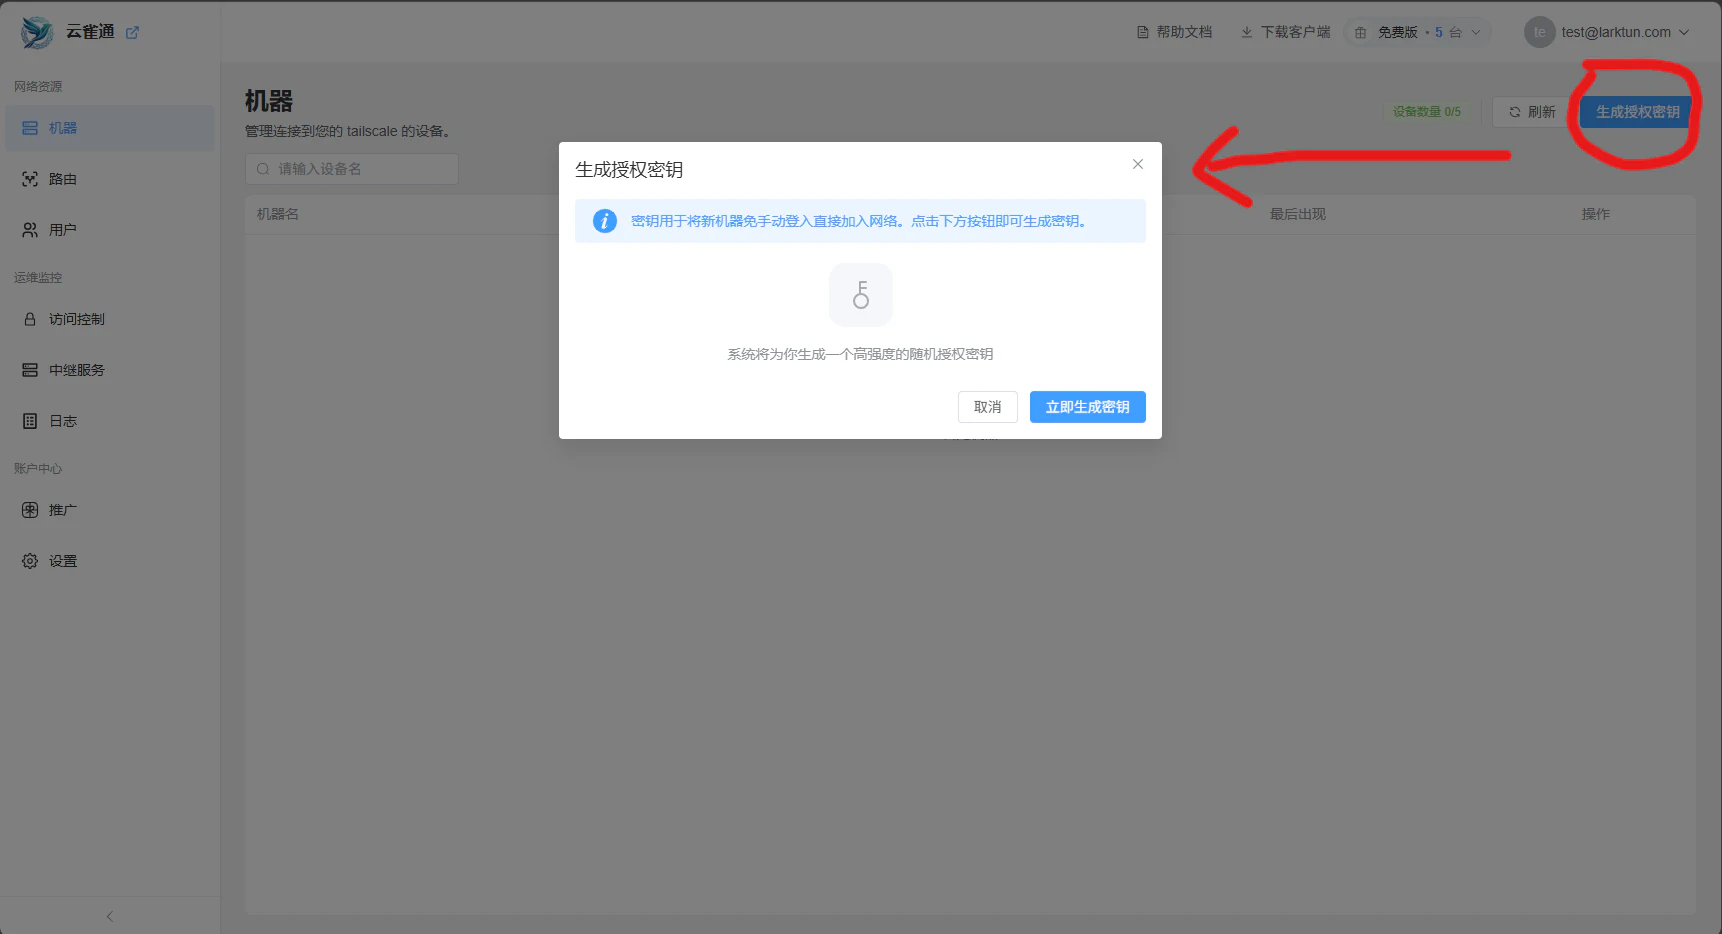
Keep the terminal open. In your browser, open and sign in to the Larktun console:
- Enter your tenant or workspace.
- Open Nodes (Devices) from the left navigation.
- Click Create Auth Key in the top-right corner.
- Click Create Key Now in the dialog.
- Copy and safely store the generated key immediately. The complete key is normally shown only once.
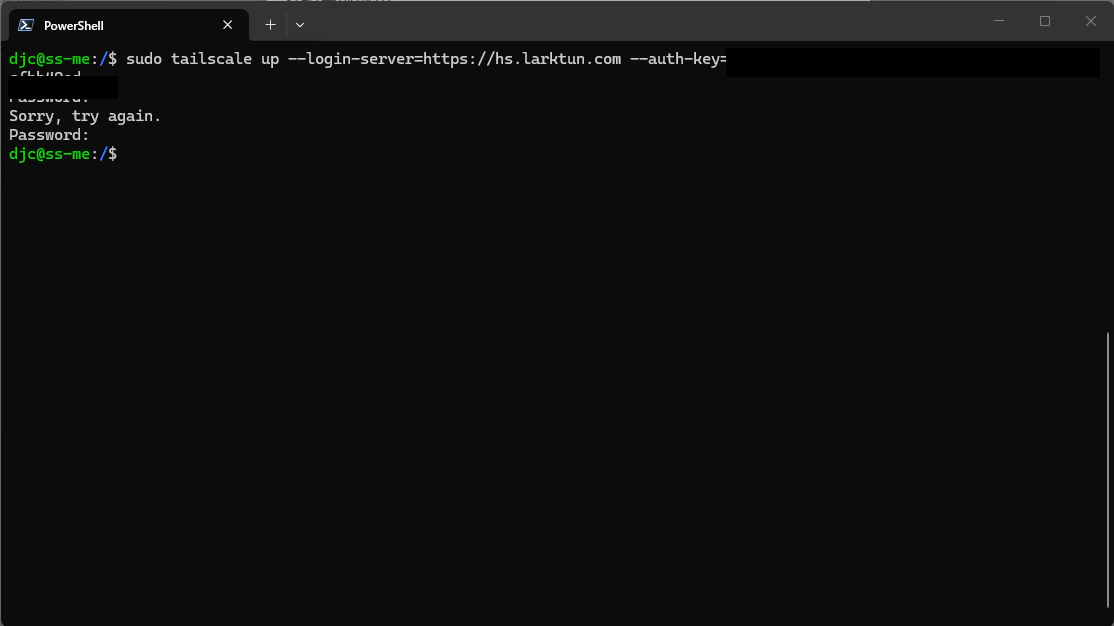
Never send a real Auth Key to another person or include it in screenshots, chats, or public documentation. The key value in this guide's terminal screenshots has been covered.
6. Log in to Larktun from the Synology terminal
Return to the Synology terminal. First, understand the two important parameters:
- server:
--login-server=https://hs.larktun.comselects the Larktun access server. It tells Tailscale to connect to Larktun instead of another control service. - key:
--auth-key=YOUR_AUTH_KEYsupplies the key created in Larktun. ReplaceYOUR_AUTH_KEYcompletely with your own key.
After replacing the key, run this complete command on one line:
sudo tailscale up --login-server=https://hs.larktun.com --auth-key=YOUR_AUTH_KEY
Check these details:
- Do not leave the placeholder
YOUR_AUTH_KEYin the command. - Do not add spaces around either equals sign (
=). - Do not shorten the server to
larktun.com; use the completehttps://hs.larktun.comURL. - If your Larktun console explicitly shows a different server URL, use the URL shown there.

The sudo command may show another Password: prompt. Enter your Synology DSM account password, not the Auth Key. The password remains invisible while you type.
If no error appears and the terminal returns to a prompt such as username@NAS-name:~$, the login command has normally completed successfully.
7. Confirm that the Synology NAS is online in Larktun
Return to Nodes (Devices) in the Larktun console and click Refresh. After a few seconds, the Synology NAS should appear with its name, a private Larktun address, and a green Connected status.
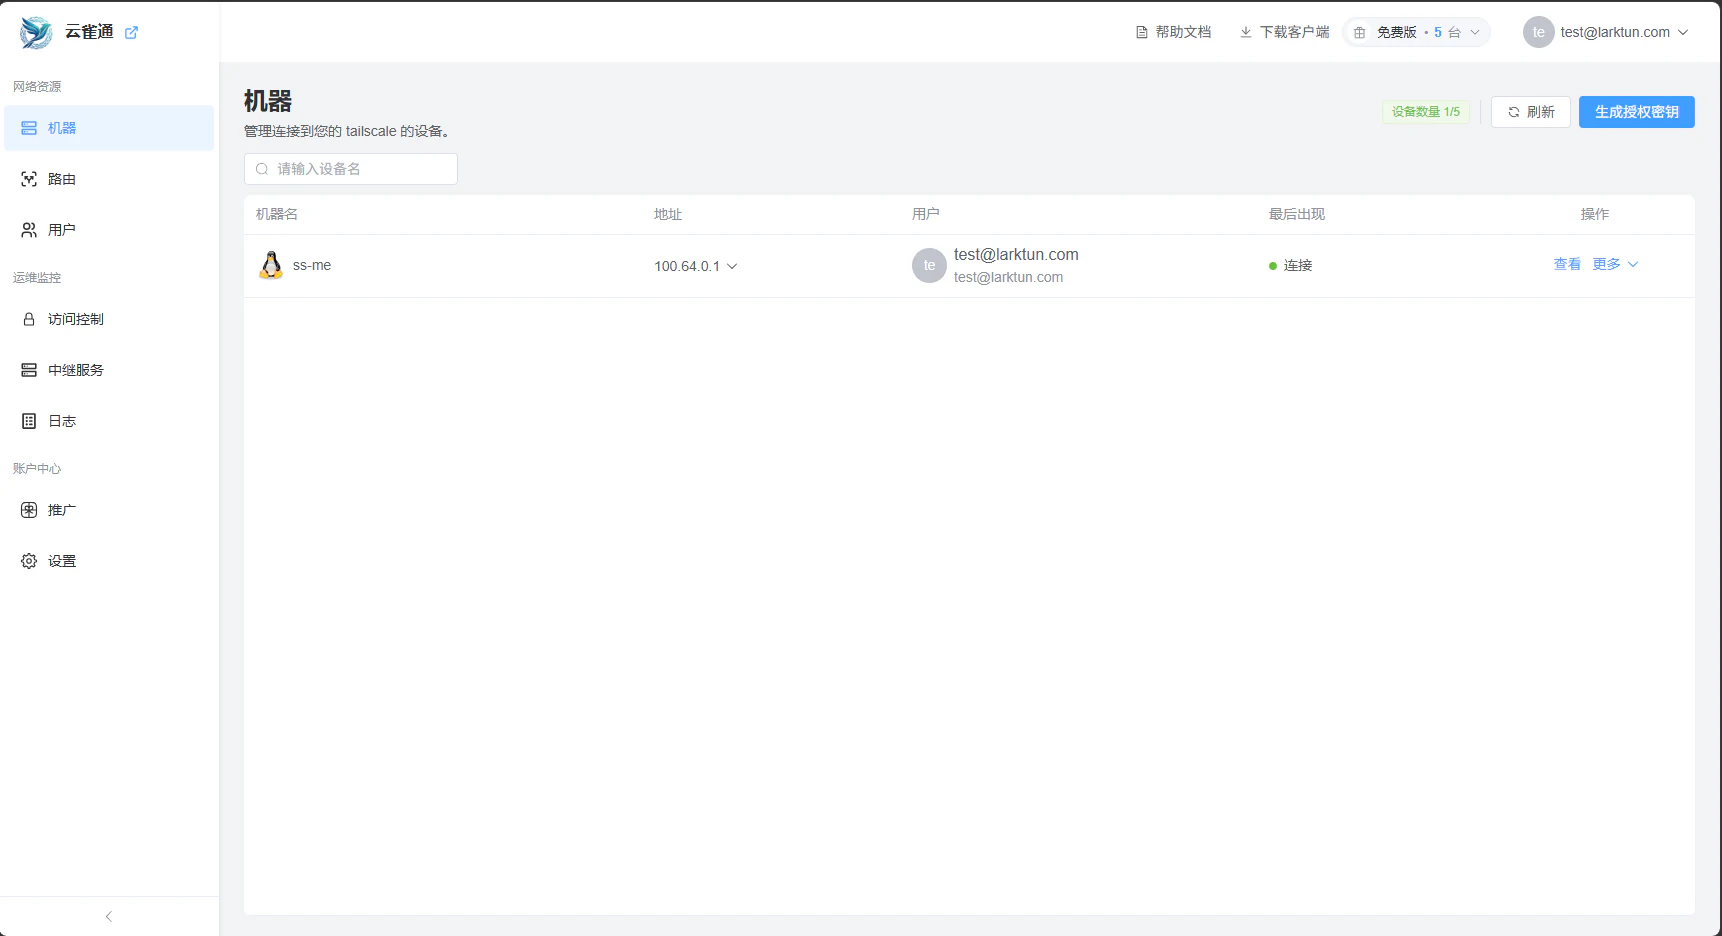
The Synology NAS is now a device in your Larktun network. Next, connect your computer to the same Larktun network and use the NAS's private address to open DSM.
8. Access Synology DSM from a computer through 100.64.0.x
After connecting the NAS, sign in to Larktun on the computer you will use for access. The computer can run Windows or macOS and does not need to remain on the same LAN as the NAS.
- Install and open the Larktun desktop client. See the Desktop Client Guide for detailed instructions.
- Sign in to the same Larktun account, tenant, or workspace used by the Synology NAS.
- Confirm that the top of the client shows Connected and that the Synology NAS appears Online in the device list.
- Find the Synology NAS private IP in the device list or Larktun console. It normally has the form
100.64.0.x, such as100.64.0.2in the screenshot. - Open a browser and enter the NAS private IP together with the DSM port.
The default DSM HTTP port is normally 5000, so the address format is:
http://NAS_PRIVATE_IP:5000
For example, enter the following only if your own NAS private IP is actually 100.64.0.2:
http://100.64.0.2:5000
If HTTPS is enabled for DSM, the commonly used port is 5001:
https://NAS_PRIVATE_IP:5001
The screenshot's 100.64.0.2 is only an example. Find your own Synology NAS in the Larktun device list and copy its 100.64.0.x address. Do not use the private IP assigned to your computer.
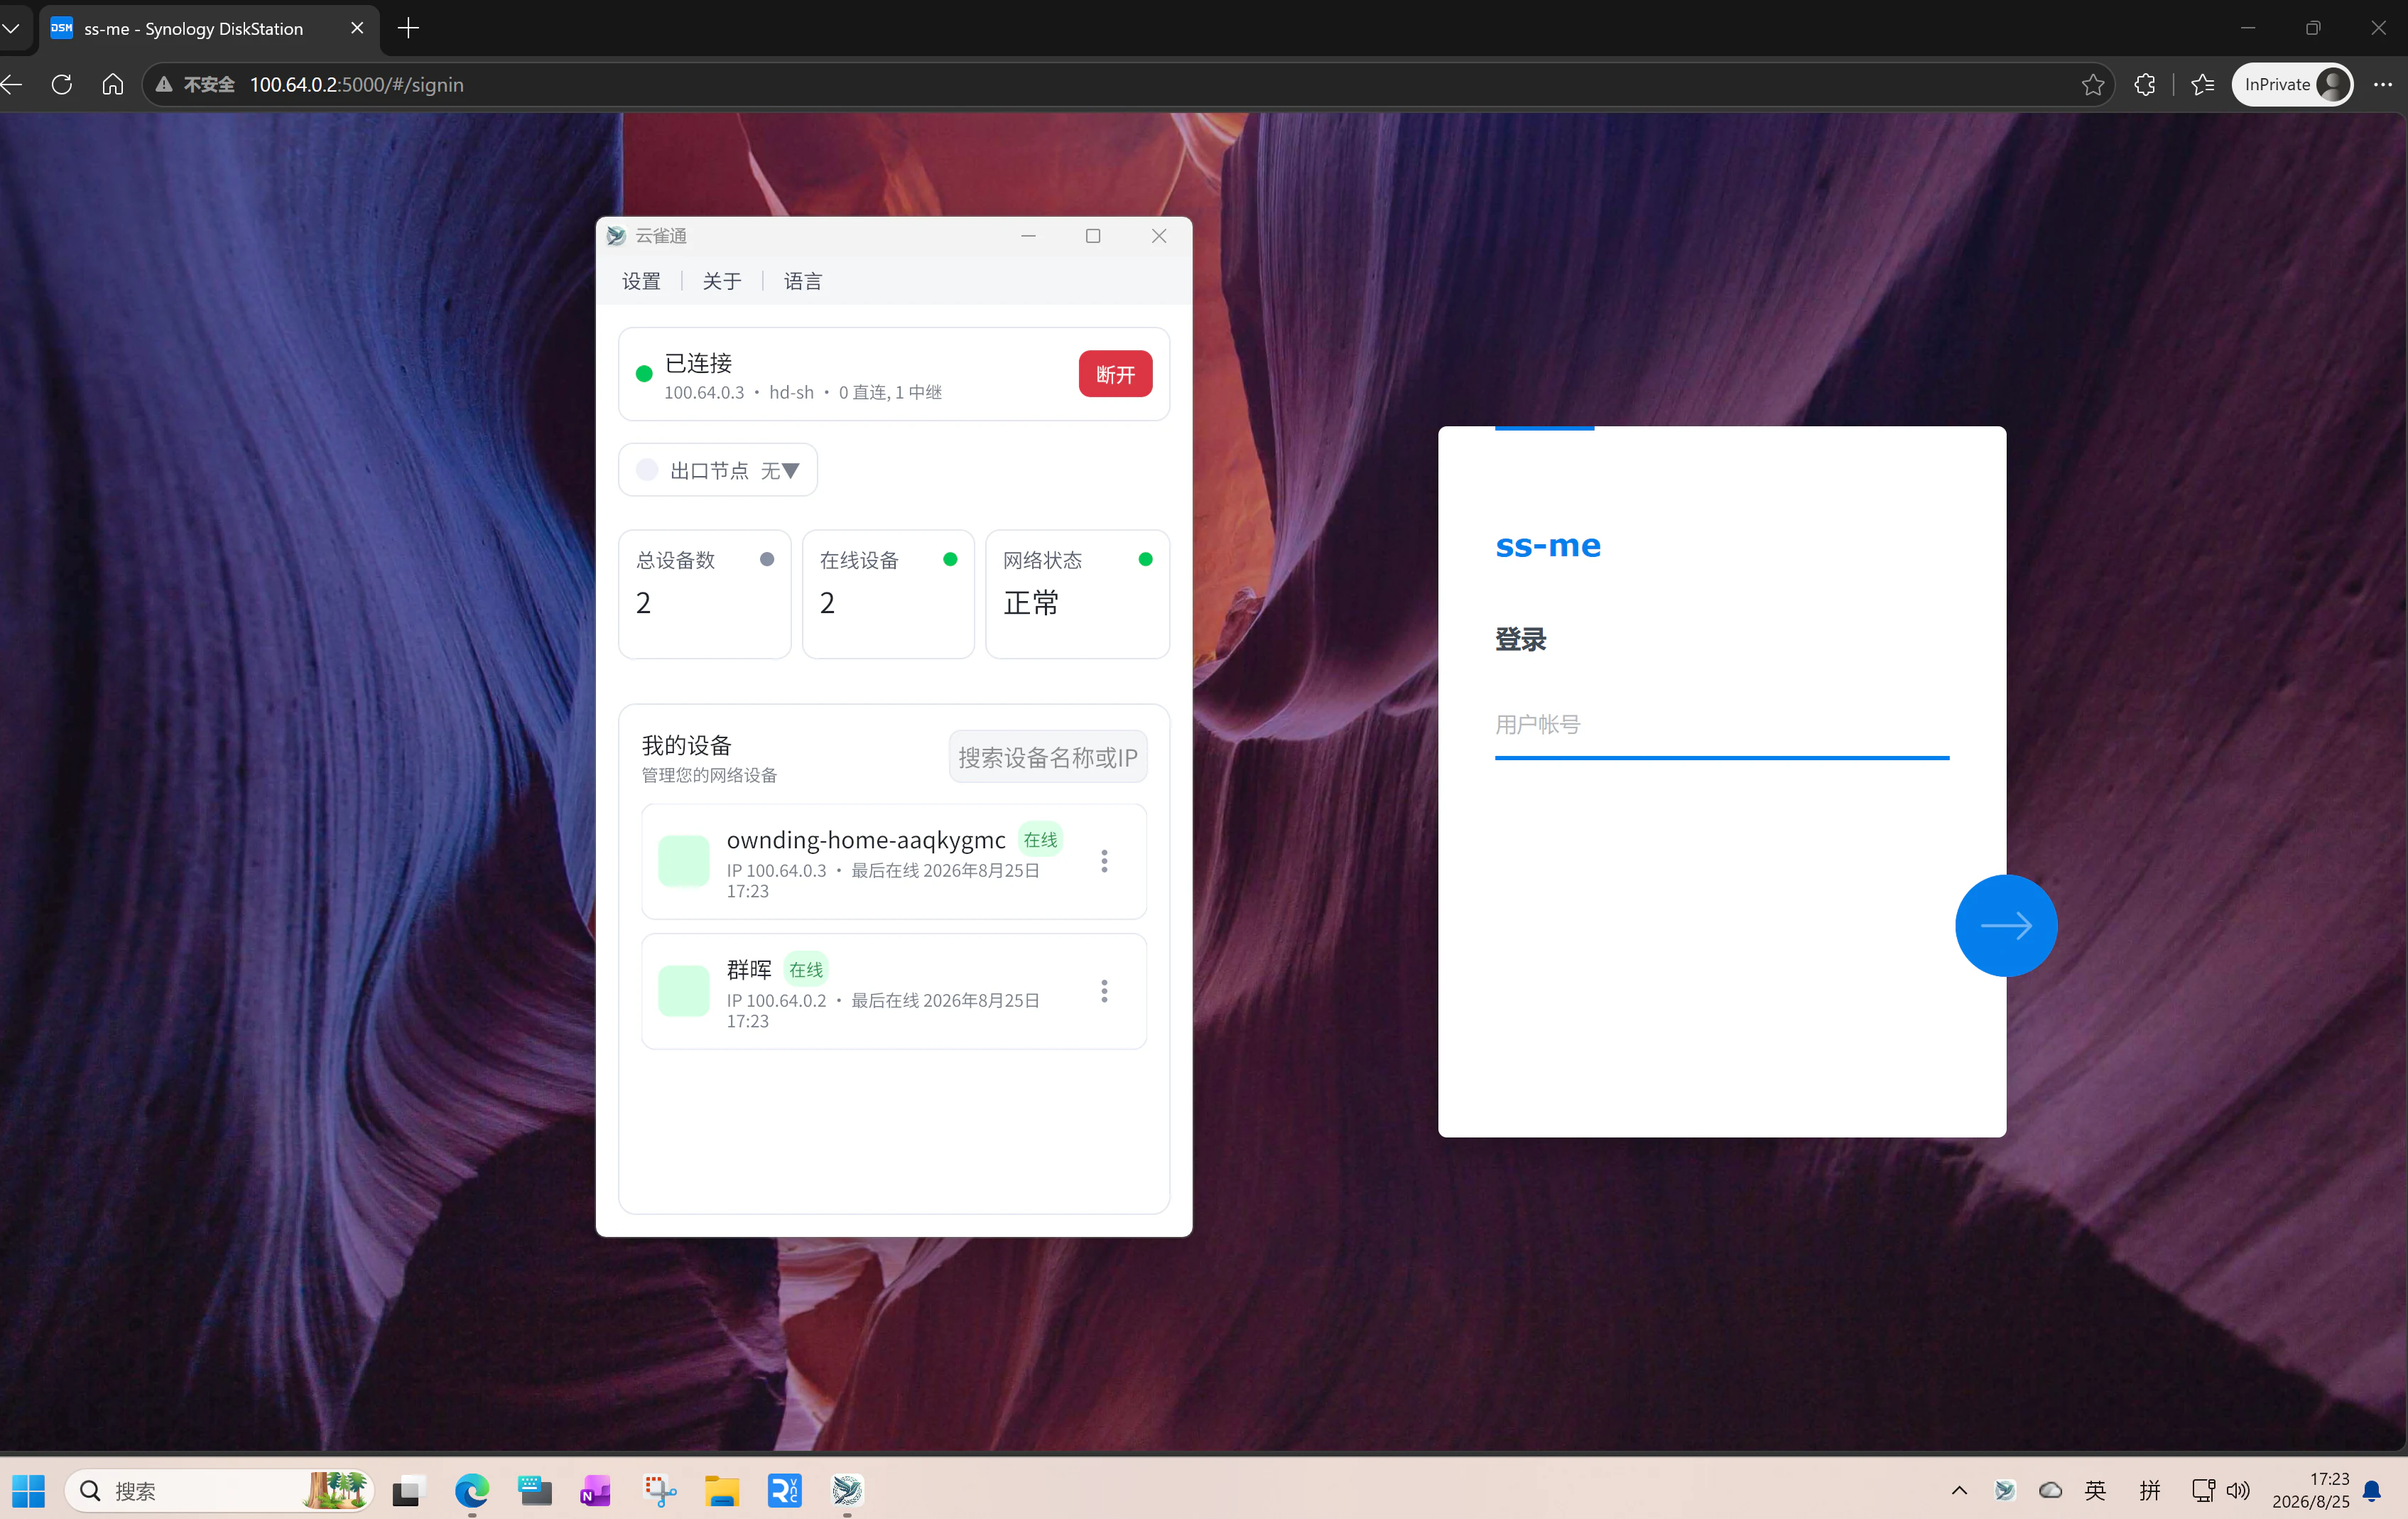
When the Synology DSM login page appears, the computer can reach the NAS through the Larktun private network. Sign in with your existing DSM username and password.
The browser may show Not secure when you use http://...:5000 because DSM port 5000 uses HTTP. If you have configured HTTPS for DSM, use https://...:5001 instead. Always use the actual ports configured in your DSM settings.
Troubleshooting
Tailscale does not appear in Package Center
Confirm that the NAS can access the internet, then refresh Package Center. Also check the Community section and make sure the package is published by Tailscale, Inc.
SSH reports Connection refused
Return to Control Panel > Terminal & SNMP. Make sure Enable SSH service is selected, the port is 22, and you clicked Apply. The computer and NAS must also be on local networks that can reach each other.
SSH keeps reporting Permission denied
Use the DSM username and DSM password, and confirm that the account belongs to the administrators group. Passwords are case-sensitive and remain invisible in the terminal.
The terminal reports tailscale: command not found
Confirm that Tailscale appears under Installed in Package Center. Close the SSH window, reconnect, and run the command again.
The login command reports an invalid key
The Auth Key may have expired, been revoked, been copied incompletely, or already been used. Create a new key on the Larktun Nodes (Devices) page and check for leading or trailing spaces or line breaks.
The command succeeds, but the NAS does not appear in Larktun
Wait a few seconds and refresh the device list, then check:
- You created the key and viewed devices in the same tenant or workspace.
- The server is the complete
https://hs.larktun.comURL or the URL specified by your console. - The Synology Tailscale package is still installed and running.
The computer cannot open DSM through 100.64.0.x
Check the following items in order:
- The desktop Larktun client shows Connected, and the Synology NAS appears Online.
- You entered the NAS private IP rather than the computer's own
100.64.0.xaddress. - The DSM management port is still
5000, or the HTTPS port is5001. - The Larktun ACL and Synology firewall allow this computer to access the DSM port.
- If you changed the DSM ports, replace
5000or5001with the actual configured port.
Security cleanup after setup
If you no longer need local terminal access, return to Control Panel > Terminal & SNMP, clear Enable SSH service, and apply the change. Disabling SSH does not disconnect the running Tailscale package from Larktun.